The Linux command line is a text interface to your computer. Often referred to as the shell, terminal, console, prompt or various other names, it can give the appearance of being complex and confusing to use. Yet the ability to copy and paste commands from a website, combined with the power and flexibility the command line offers, means that using it may be essential when trying to follow instructions online, including many on this very website!
This tutorial will teach you a little of the history of the command line, then walk you through some practical exercises to become familiar with a few basic commands and concepts. We’ll assume no prior knowledge, but by the end we hope you’ll feel a bit more comfortable the next time you’re faced with some instructions that begin “Open a terminal”.
Every Linux system includes a command line of one sort or another. This tutorial includes some specfic steps for Ubuntu 18.04 but most of the content should work regardless of your Linux distribution.
about 51 minutes to go Previous step Next stepDuring the formative years of the computer industry, one of the early operating systems was called Unix. It was designed to run as a multi-user system on mainframe computers, with users connecting to it remotely via individual terminals. These terminals were pretty basic by modern standards: just a keyboard and screen, with no power to run programs locally. Instead they would just send keystrokes to the server and display any data they received on the screen. There was no mouse, no fancy graphics, not even any choice of colour. Everything was sent as text, and received as text. Obviously, therefore, any programs that ran on the mainframe had to produce text as an output and accept text as an input.
Compared with graphics, text is very light on resources. Even on machines from the 1970s, running hundreds of terminals across glacially slow network connections (by today’s standards), users were still able to interact with programs quickly and efficiently. The commands were also kept very terse to reduce the number of keystrokes needed, speeding up people’s use of the terminal even more. This speed and efficiency is one reason why this text interface is still widely used today.
When logged into a Unix mainframe via a terminal users still had to manage the sort of file management tasks that you might now perform with a mouse and a couple of windows. Whether creating files, renaming them, putting them into subdirectories or moving them around on disk, users in the 70s could do everything entirely with a textual interface.
Each of these tasks required its own program or command: one to change directories ( cd ), another to list their contents ( ls ), a third to rename or move files ( mv ), and so on. In order to coordinate the execution of each of these programs, the user would connect to one single master program that could then be used to launch any of the others. By wrapping the user’s commands this “shell” program, as it was known, could provide common capabilities to any of them, such as the ability to pass data from one command straight into another, or to use special wildcard characters to work with lots of similarly named files at once. Users could even write simple code (called “shell scripts”) which could be used to automate long series of shell commands in order to make complex tasks easier. The original Unix shell program was just called sh , but it has been extended and superceded over the years, so on a modern Linux system you’re most likely to be using a shell called bash . Don’t worry too much about which shell you have, all the content in this tutorial will work on just about all of them.
Linux is a sort-of-descendent of Unix. The core part of Linux is designed to behave similarly to a Unix system, such that most of the old shells and other text-based programs run on it quite happily. In theory you could even hook up one of those old 1970s terminals to a modern Linux box, and access the shell through that. But these days it’s far more common to use a software terminal: that same old Unix-style text interface, but running in a window alongside your graphical programs. Let’s see how you can do that yourself!
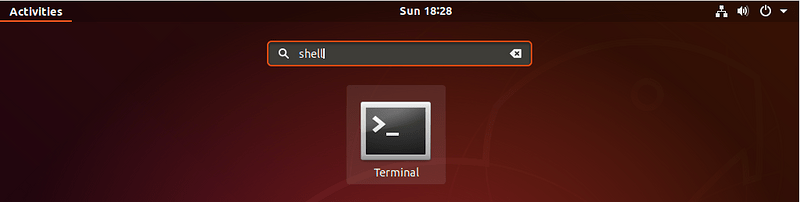
about 48 minutes to goOn a Ubuntu 18.04 system you can find a launcher for the terminal by clicking on the Activities item at the top left of the screen, then typing the first few letters of “terminal”, “command”, “prompt” or “shell”. Yes, the developers have set up the launcher with all the most common synonyms, so you should have no problems finding it.
Other versions of Linux, or other flavours of Ubuntu, will usually have a terminal launcher located in the same place as your other application launchers. It might be hidden away in a submenu or you might have to search for it from within your launcher, but it’s likely to be there somewhere.
If you can’t find a launcher, or if you just want a faster way to bring up the terminal, most Linux systems use the same default keyboard shortcut to start it: Ctrl-Alt-T.
However you launch your terminal, you should end up with a rather dull looking window with an odd bit of text at the top, much like the image below. Depending on your Linux system the colours may not be the same, and the text will likely say something different, but the general layout of a window with a large (mostly empty) text area should be similar.

Let’s run our first command. Click the mouse into the window to make sure that’s where your keystrokes will go, then type the following command, all in lower case, before pressing the Enter or Return key to run it.
You should see a directory path printed out (probably something like /home/YOUR_USERNAME ), then another copy of that odd bit of text.
 Result of running the pwd command" width="497" height="183" />
There are a couple of basics to understand here, before we get into the detail of what the command actually did. First is that when you type a command it appears on the same line as the odd text. That text is there to tell you the computer is ready to accept a command, it’s the computer’s way of prompting you. In fact it’s usually referred to as the prompt, and you might sometimes see instructions that say “bring up a prompt”, “open a command prompt”, “at the bash prompt” or similar. They’re all just different ways of asking you to open a terminal to get to a shell.
On the subject of synonyms, another way of looking at the prompt is to say that there’s a line in the terminal into which you type commands. A command line, if you will. Again, if you see mention of “command line”, including in the title of this very tutorial, it’s just another way of talking about a shell running in a terminal.
The second thing to understand is that when you run a command any output it produces will usually be printed directly in the terminal, then you’ll be shown another prompt once it’s finished. Some commands can output a lot of text, others will operate silently and won’t output anything at all. Don’t be alarmed if you run a command and another prompt immediately appears, as that usually means the command succeeded. If you think back to the slow network connections of our 1970s terminals, those early programmers decided that if everything went okay they may as well save a few precious bytes of data transfer by not saying anything at all.
The importance of case
Be extra careful with case when typing in the command line. Typing PWD instead of pwd will produce an error, but sometimes the wrong case can result in a command appearing to run, but not doing what you expected. We’ll look at case a little more on the next page but, for now, just make sure to type all the following lines in exactly the case that’s shown.